Elevate Your Designs: Mastering Material Adjustments in Speaker Box Lite
Master material adjustments in Speaker Box Lite: fine-tune custom textures, colors, and lighting parameters (like Metallic and Roughness) for high-quality, realistic 3D speaker box visualizations.
The most critical factor in achieving a high-quality visualization of any 3D model is the meticulous application of materials. To give your speaker box a unique and professional appearance, you should utilize a range of colors and real-world textures for maximum realism. Speaker Box Lite provides extensive options to fine-tune your box's materials, ensuring a more natural look and offering you vast flexibility in your design process. The following section explores how to adjust materials in Speaker Box Lite and the customization options available.
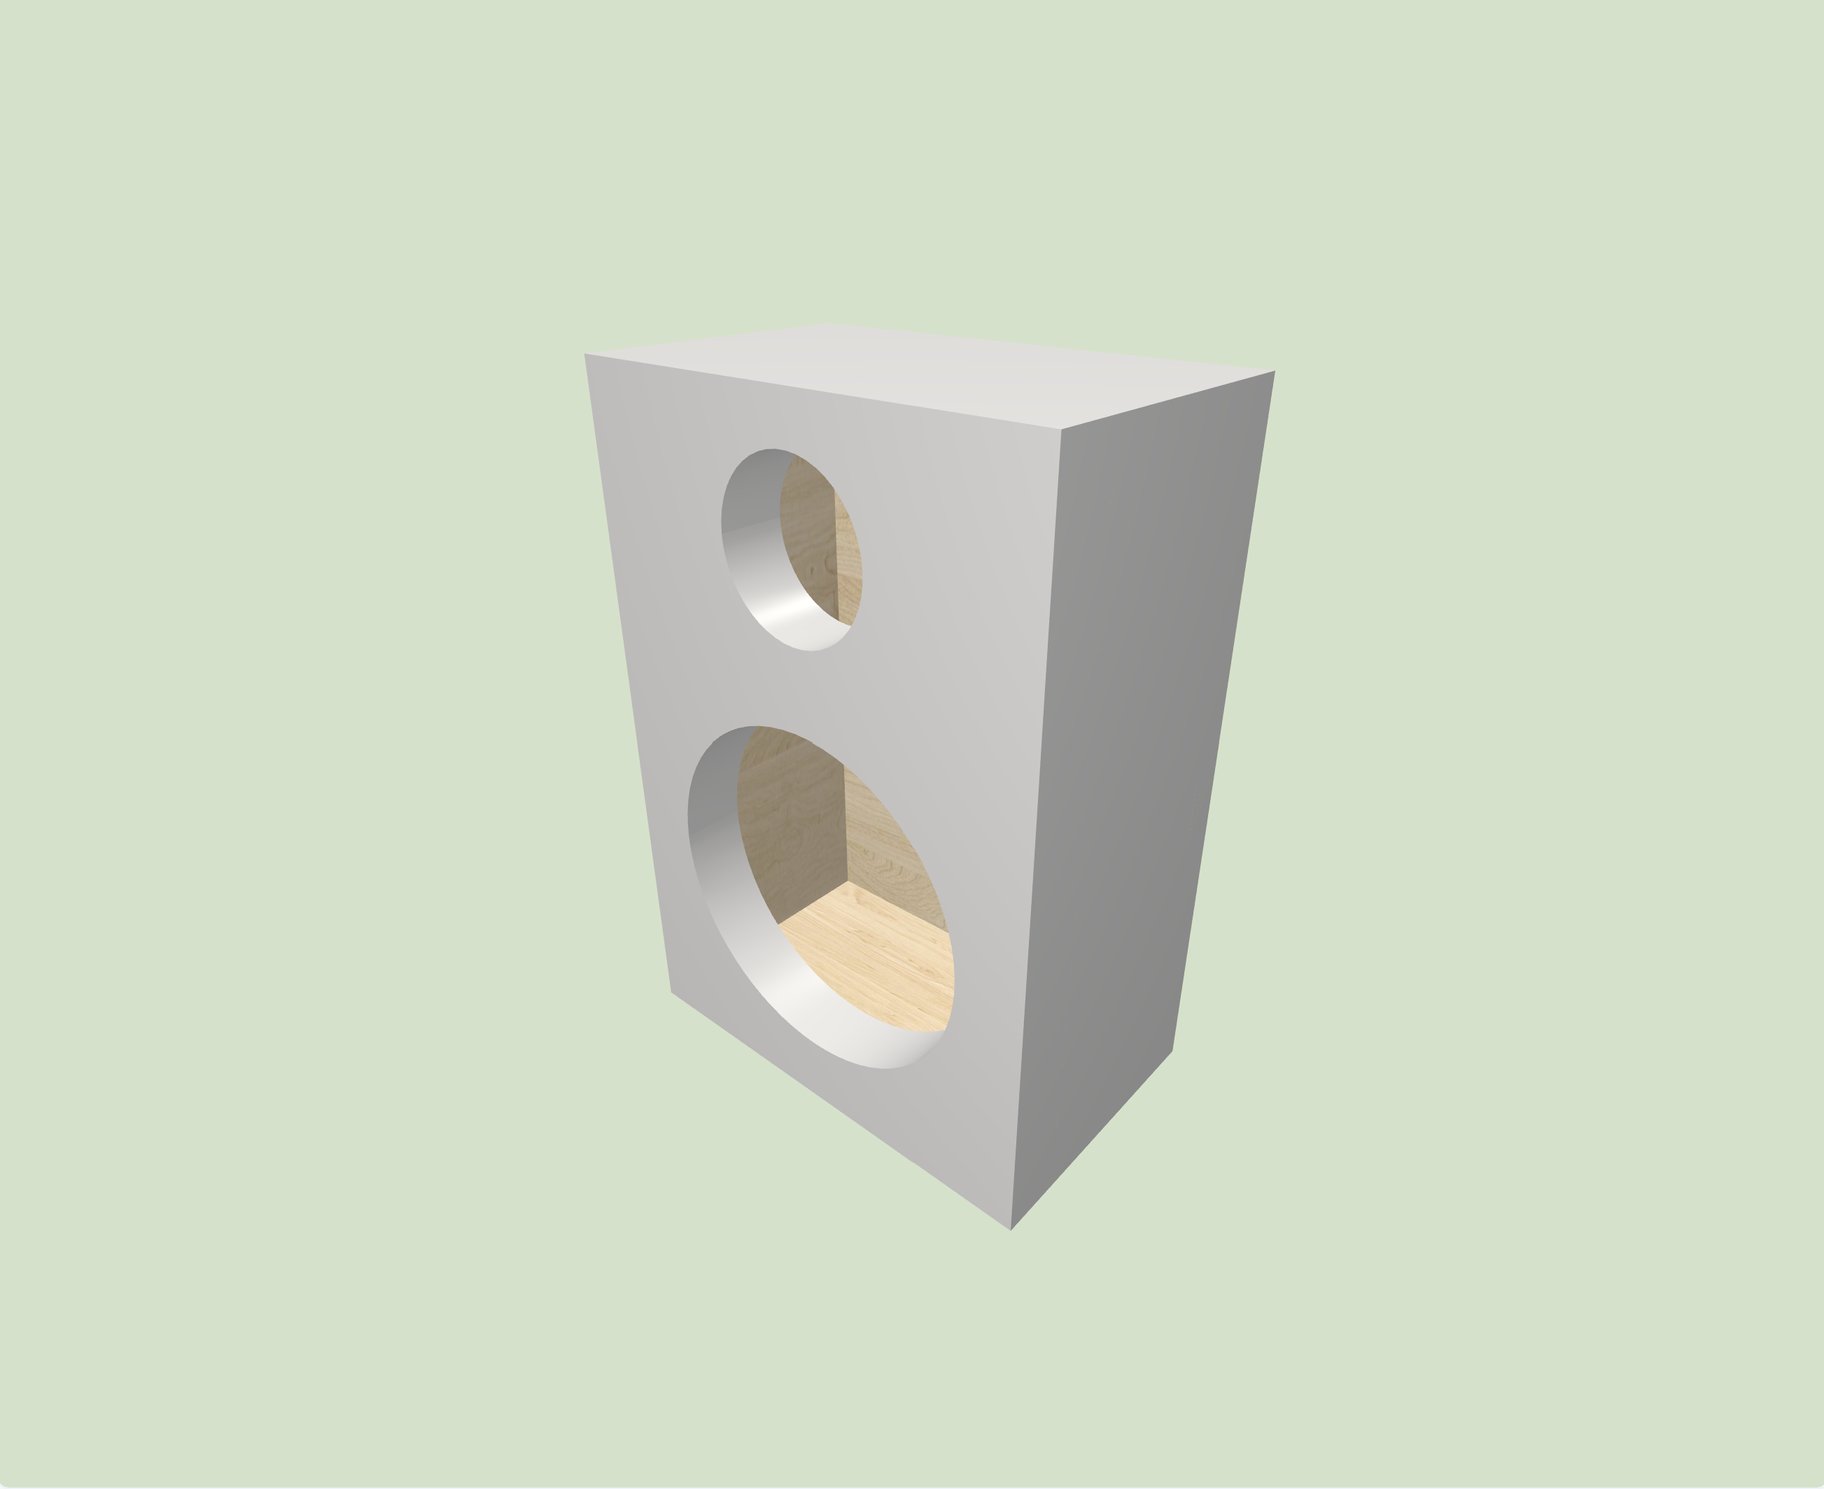
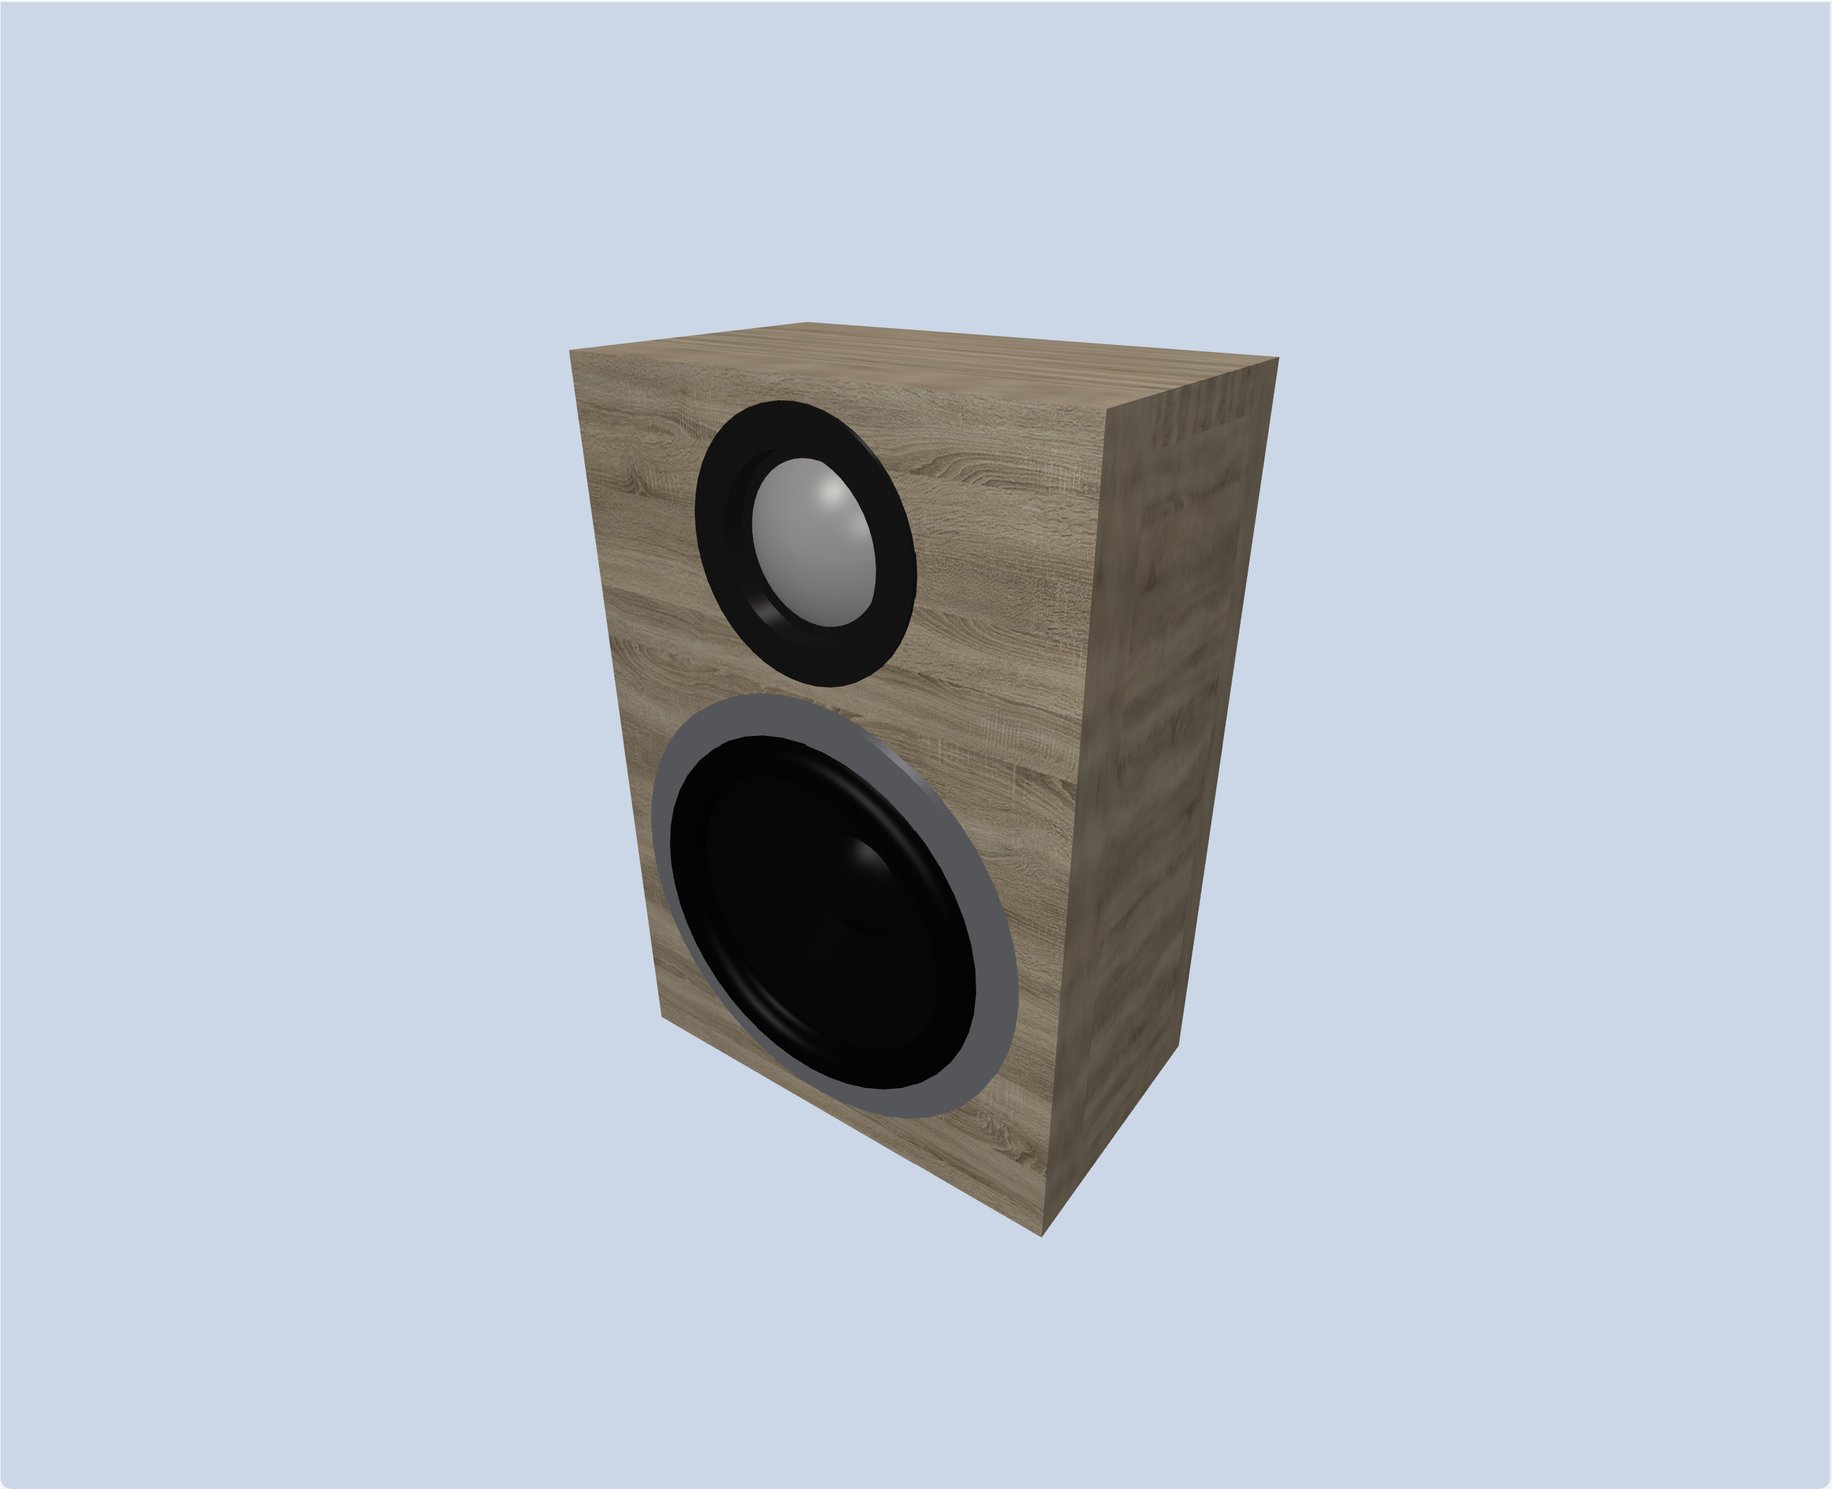
Speaker enclosure material rendering with solid color finish
Change Material
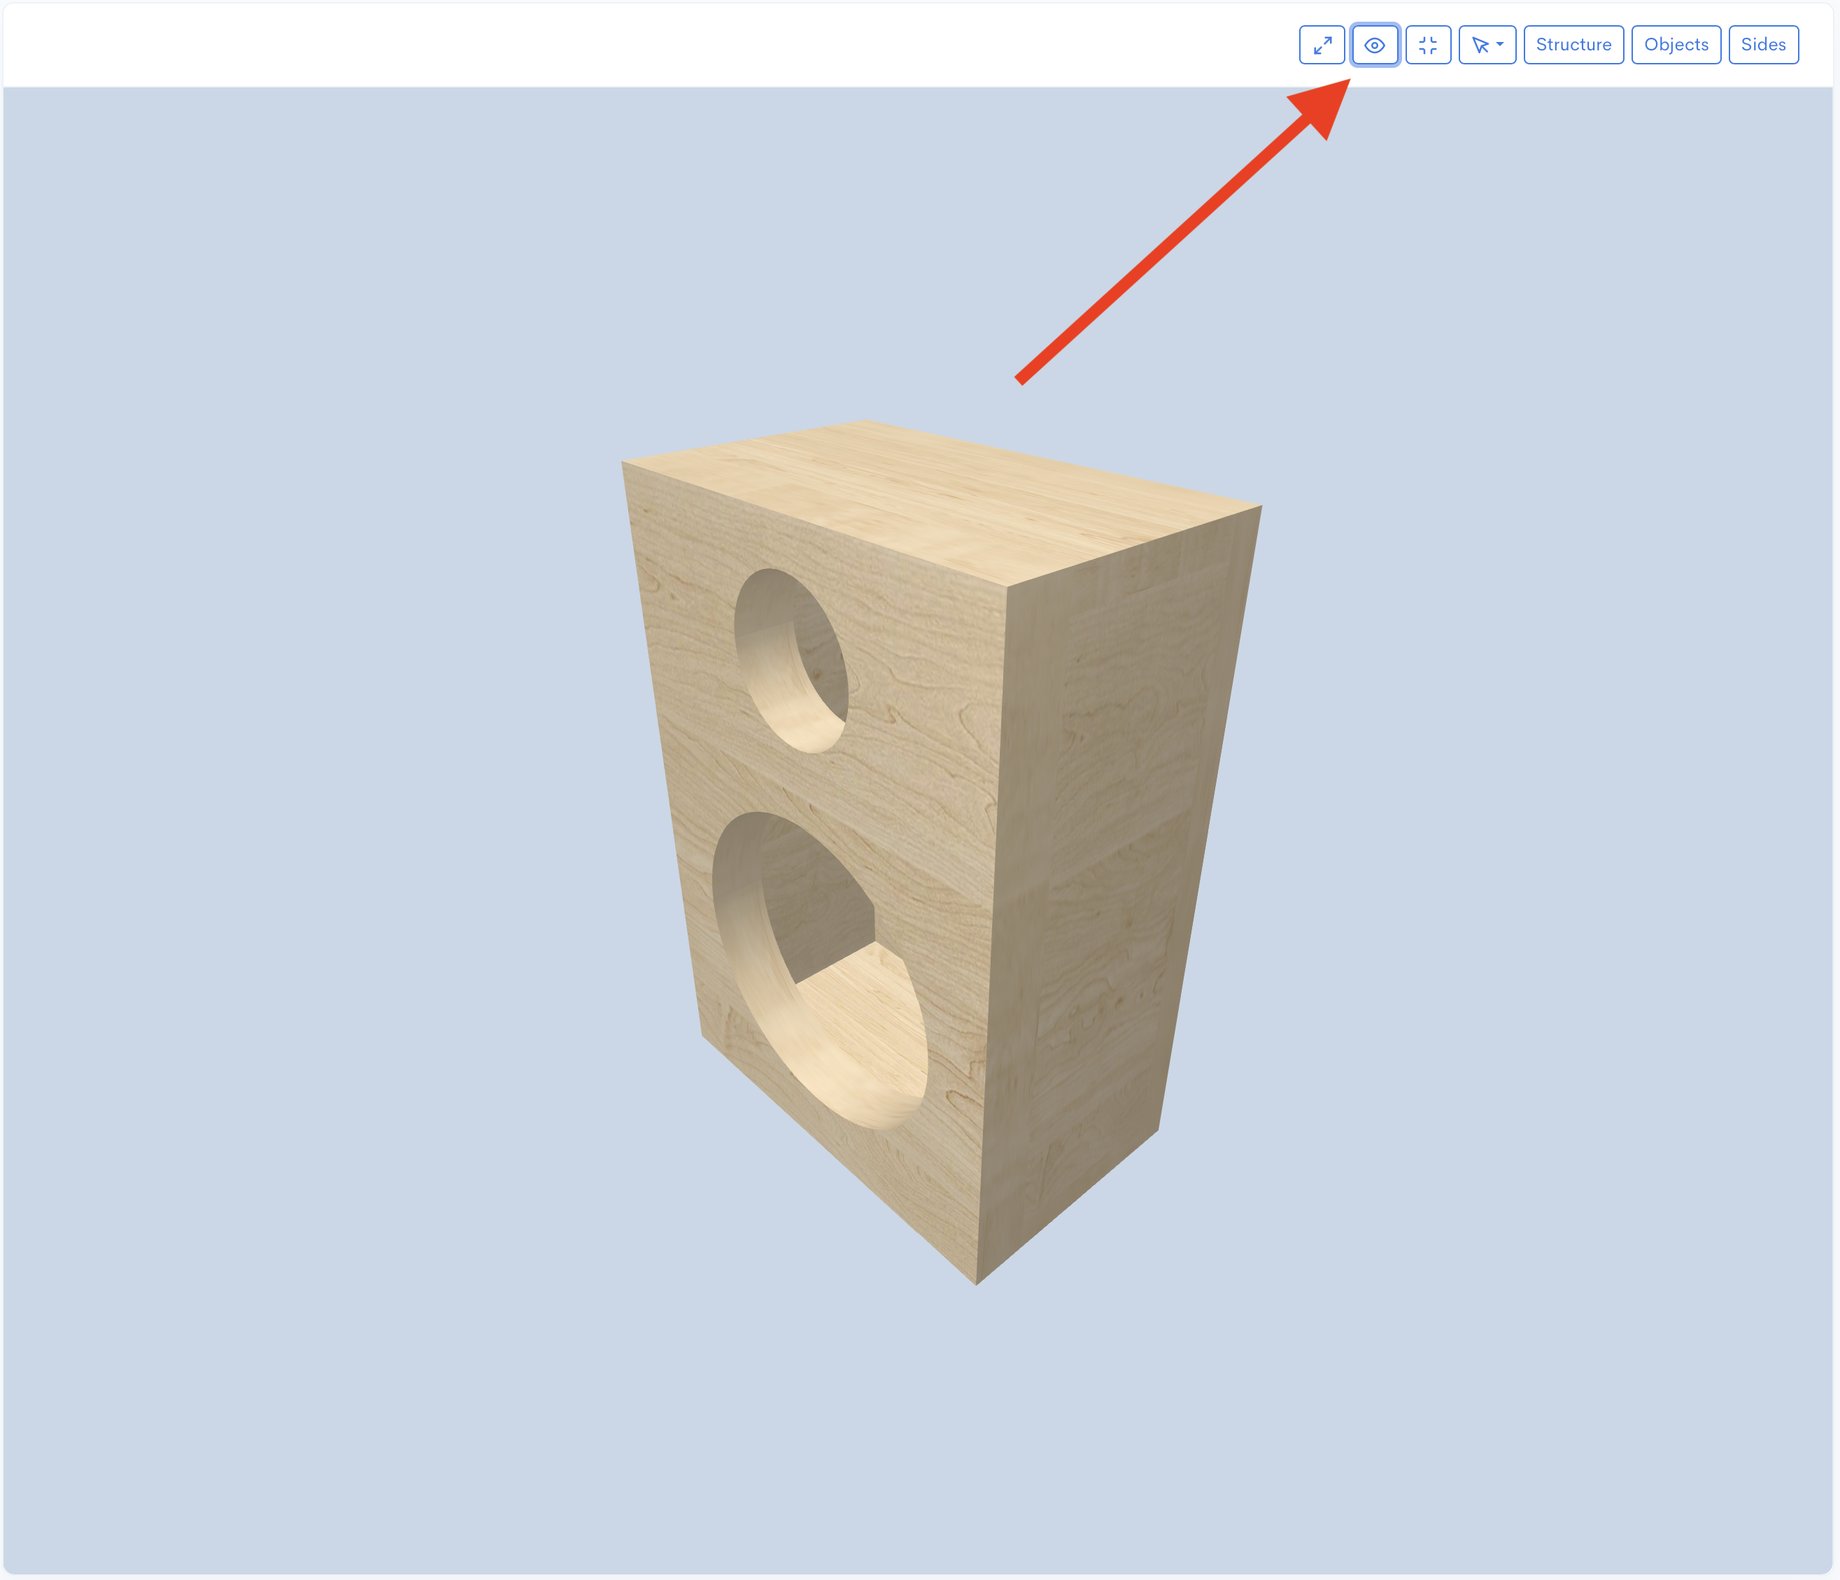
Speaker Box Lite offers a variety of built-in materials, allowing you to easily customize the appearance of your box. You can currently change both the inside and outside materials (more options later). To do this, navigate to the Visualisation settings screen, and click the "Change" button in either the Inside or Outside material section (depending on which you wish to modify). In the screen that appears, simply click on any of the pre-set materials to select it. Your new texture is now applied to the box. It's that simple!
Steps to follow to change or add custom materials
Creating Custom Materials
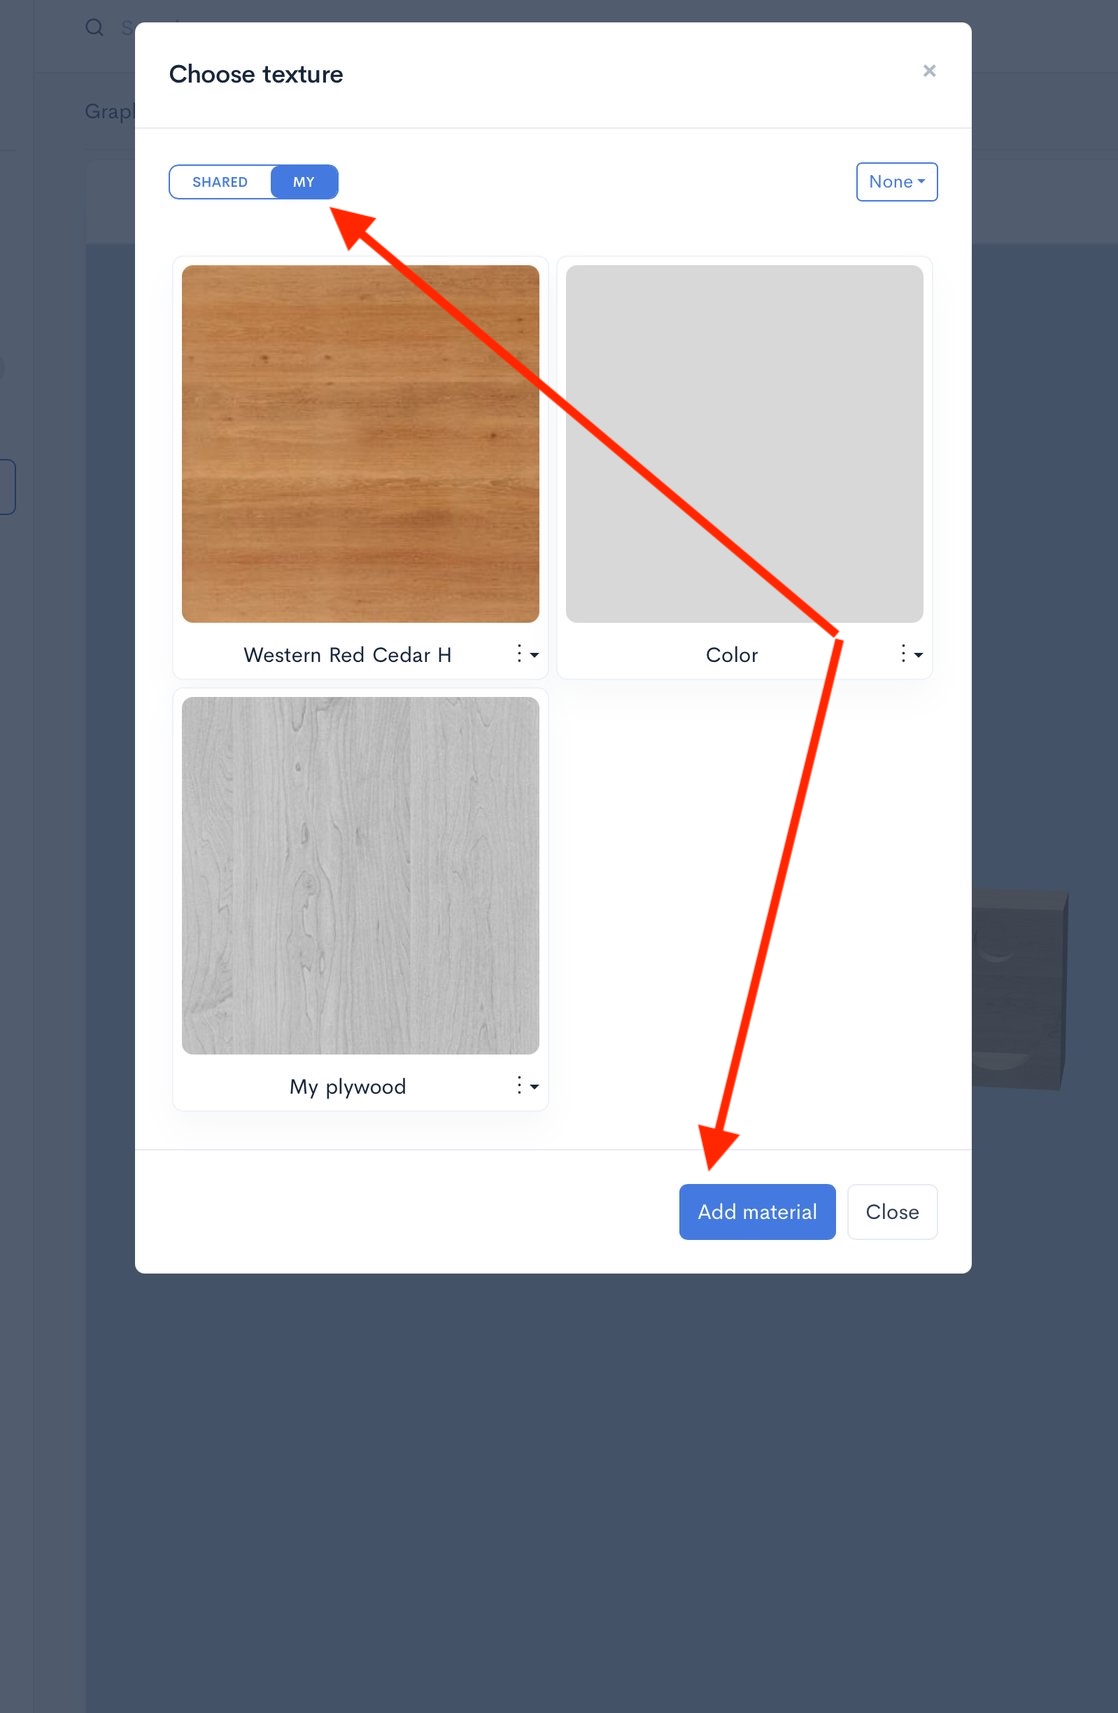
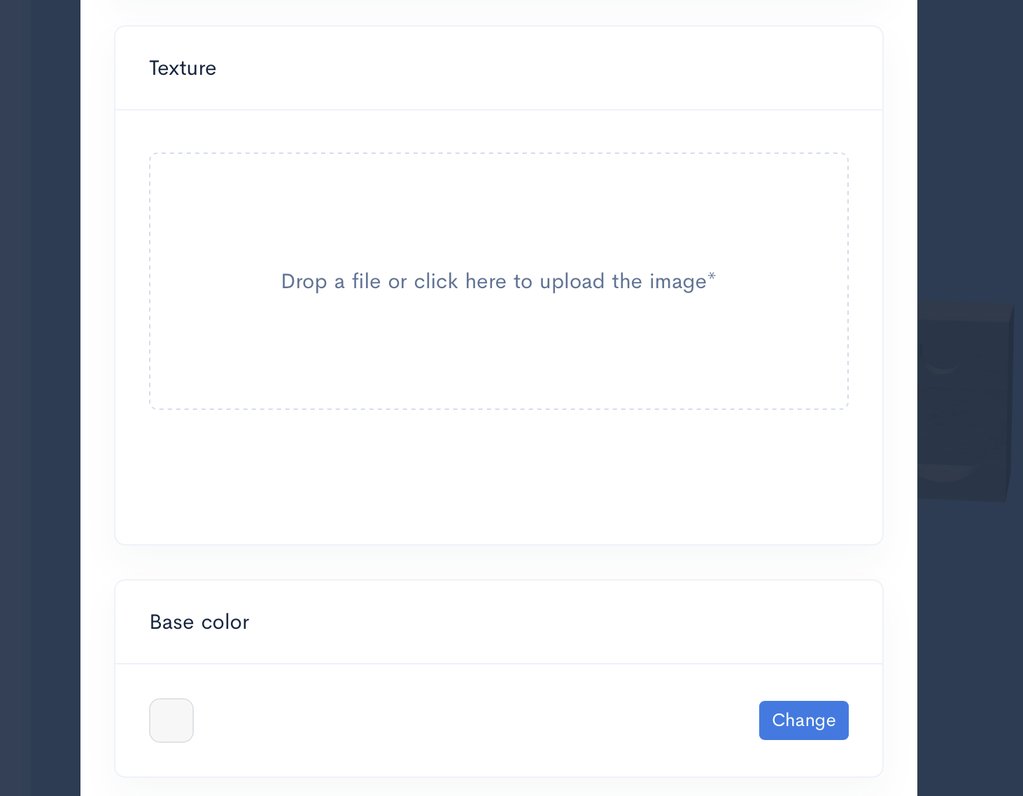
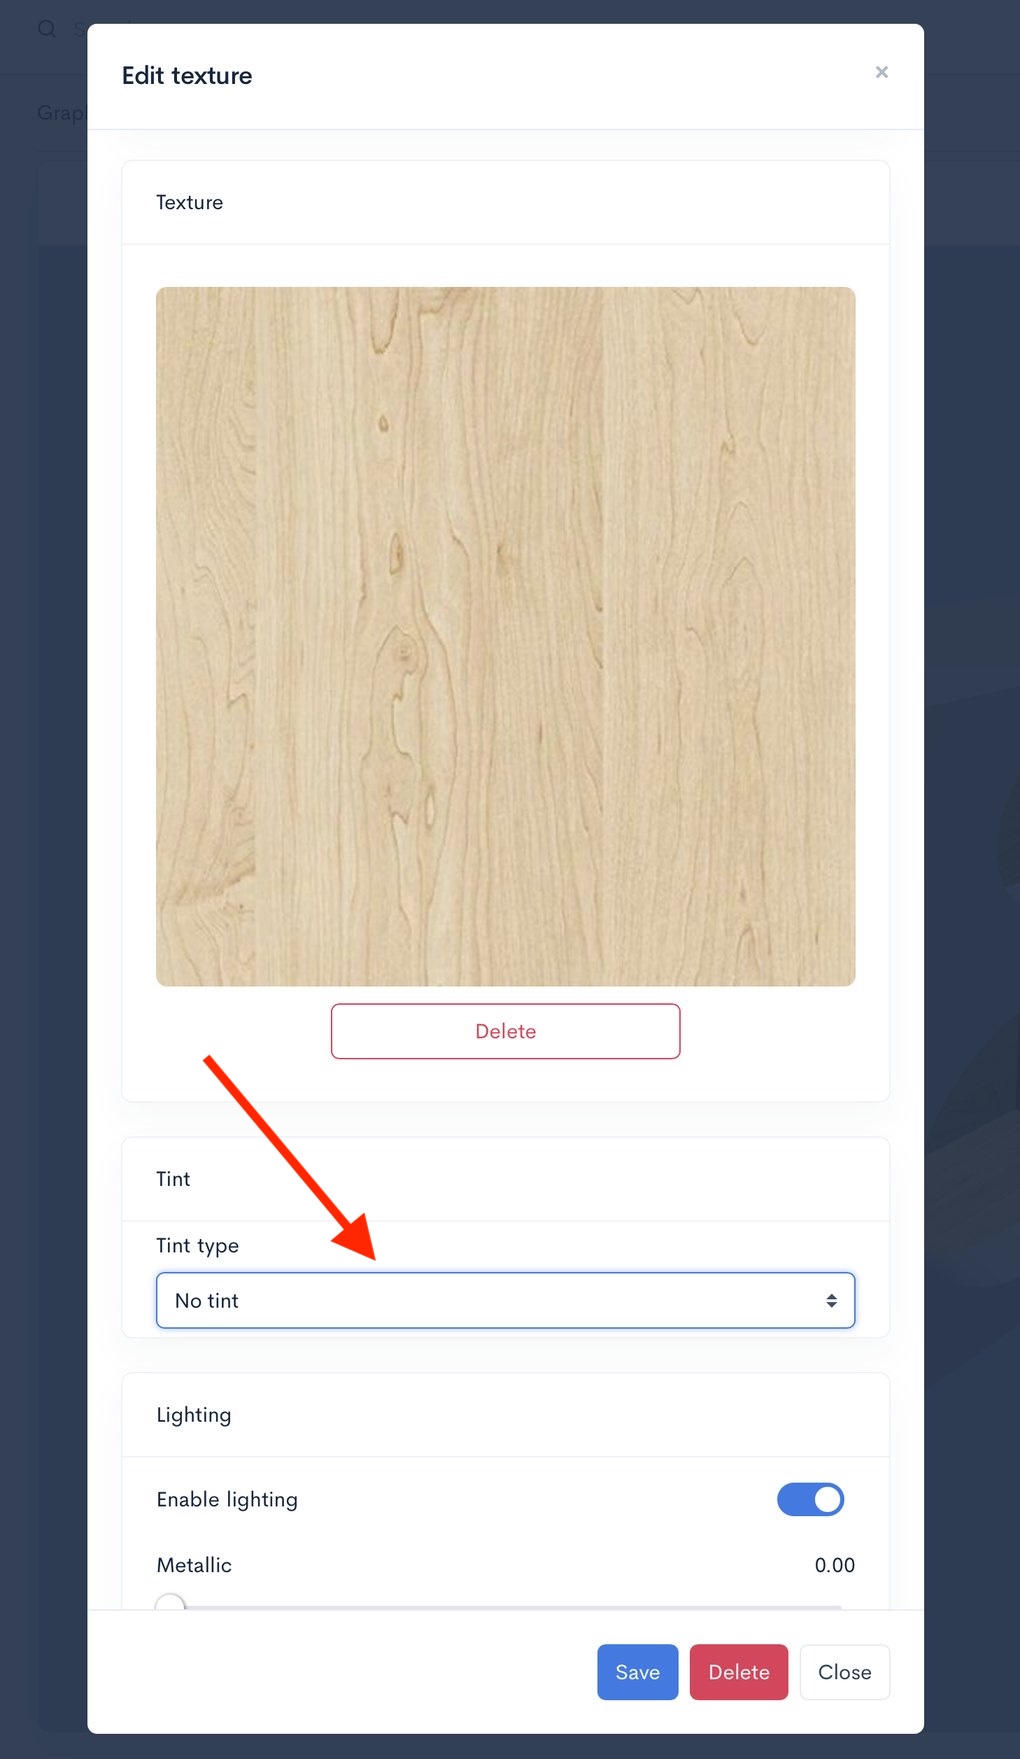
If the built-in material options are insufficient for your needs, you have the ability to create and use your own custom materials. To do this, navigate to the same material selection screen you used previously. Switch to the "My" tab and click the "Add" button. This will open the "Add new material" screen.
Interface for adding and configuring custom speaker box materials
Let's explore the various options available on this screen.
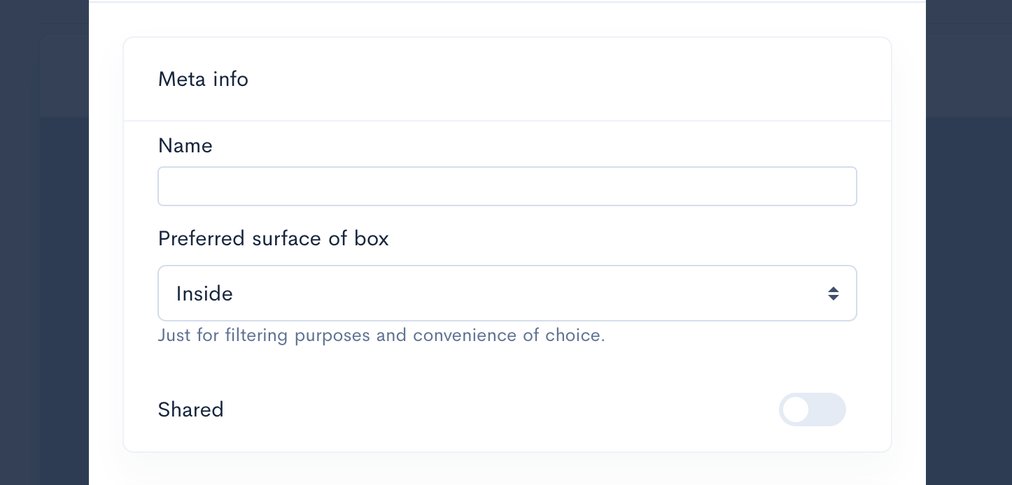
Meta Information
To easily locate your material, you must first complete the meta information.
Name: Fill in the name of the material.
Preferred surface of box: Select an option from the drop-down menu. Note: This selection is purely for filtering purposes and does not affect the material itself.
Meta information and name entry fields for custom speaker materials
Custom Materials: Color or Texture
You have two primary options for adding a new material: a simple Base Color (e.g., red, blue, gray) or a Texture (e.g., wood, plywood, MDF).
Interface for adding and configuring custom speaker box materials
To choose your option, either:
Upload a texture image.
Select a Base color.
Once one action is complete, the other option will disappear.
You can then click Save to add the new material to your private database for future use. This material will appear in your private database, accessible similar to those in the Shared tab
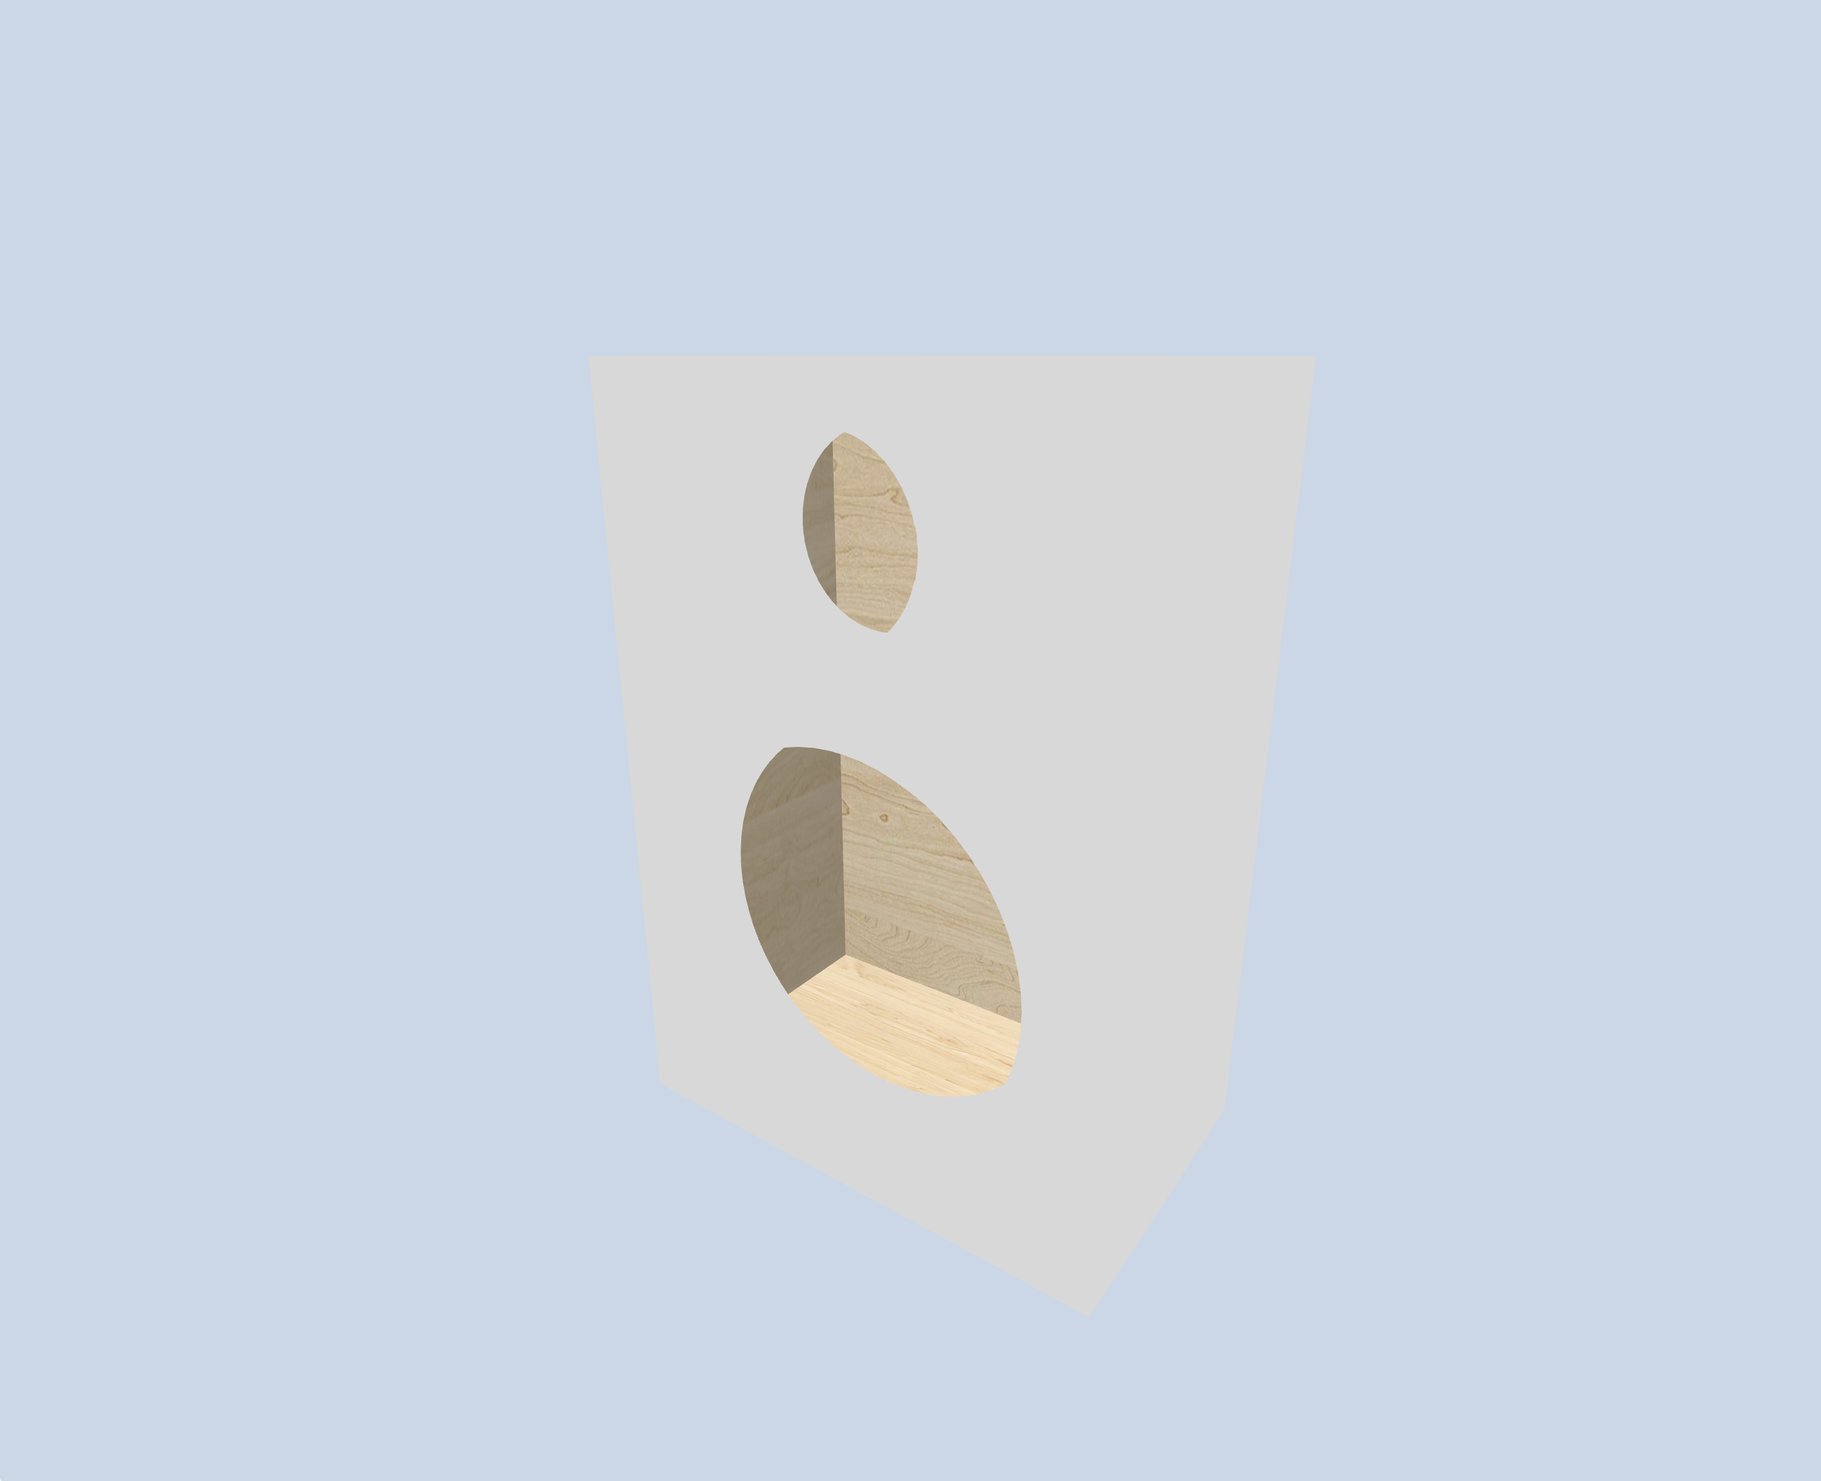
The material is basic, appearing severe and lacking depth. Its edges are barely distinct.
Note: If you apply this material, you may notice that the object appears stark and flat, as the simple, constant color lacks any visual shading.
The following two sections will demonstrate methods for enhancing our materials to achieve a more realistic appearance.
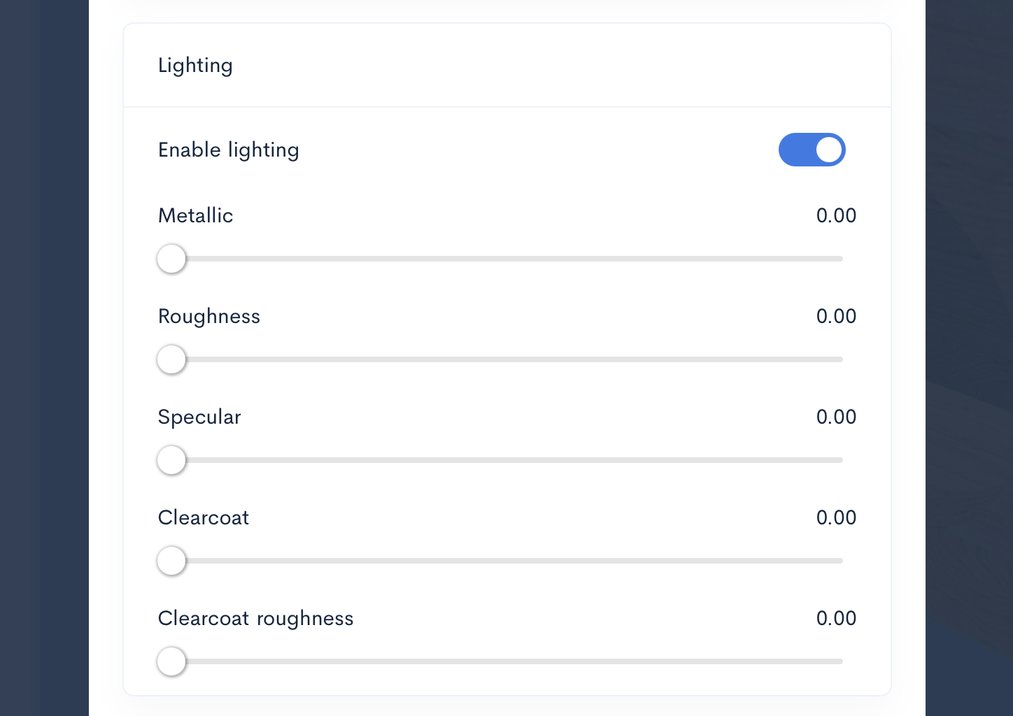
Custom Materials: Adding Light and Shine
To enable a material to react to light, activate the Lighting option when adding a new material. This action introduces several customizable parameters: Metallic, Roughness, Specular, Clearcoat, and Clearcoat roughness. By adjusting these settings in combination, you can simulate the visual characteristics of various real-world materials, including their shades and shines.
Material lighting parameters including Metallic, Roughness, and Clearcoat settings
1. Metallic: Controls whether the surface is a metal or a non-metal. Metals reflect light differently (their reflections are tinted by the material color), while non-metals have white reflections.
0.0: Used for most cabinet materials, such as MDF, wood veneer, leather, or plastic.
1.0: Used for aluminum baffles (front panels), steel speaker grilles, or assembly screws/hardware.
2. Roughness: Describes the micro-surface detail. A low value results in a sharp, mirror-like reflection, while a high value scatters light, creating a matte, blurry appearance.
Low (0.1–0.2): High-gloss finishes, like polished lacquer.
High (0.7–0.9): Matte MDF, textured plastic, or fuzzy grille cloth.
3. Specular: Controls the strength of specular reflections for dielectric materials. It defines how much light the surface reflects when viewed head-on.
Typically kept at the default 0.5 for most materials. It can be slightly increased to highlight the edges of a plastic enclosure or decreased for highly porous, light-absorbing materials like felt or acoustic foam.
4. Clearcoat: An extra transparent layer on top of the base material. It creates a secondary set of reflections, similar to a car's paint or a thick layer of polyurethane.
A key parameter for "Piano Black" finishes or high-end veneered cabinets. Even if the base wood texture is matte, Clearcoat adds a premium "glass-like" top layer.
5. Clearcoat roughness: Controls the smoothness of the Clearcoat layer itself. It is independent of the base material's roughness.
Near 0.0: A perfectly polished, mirror-like lacquer finish.
0.3–0.5: A "Satin" finish — it provides a visible sheen, but reflections remain soft and blurred.
Experiment with these parameters to witness the significant changes in your material. See the results below.
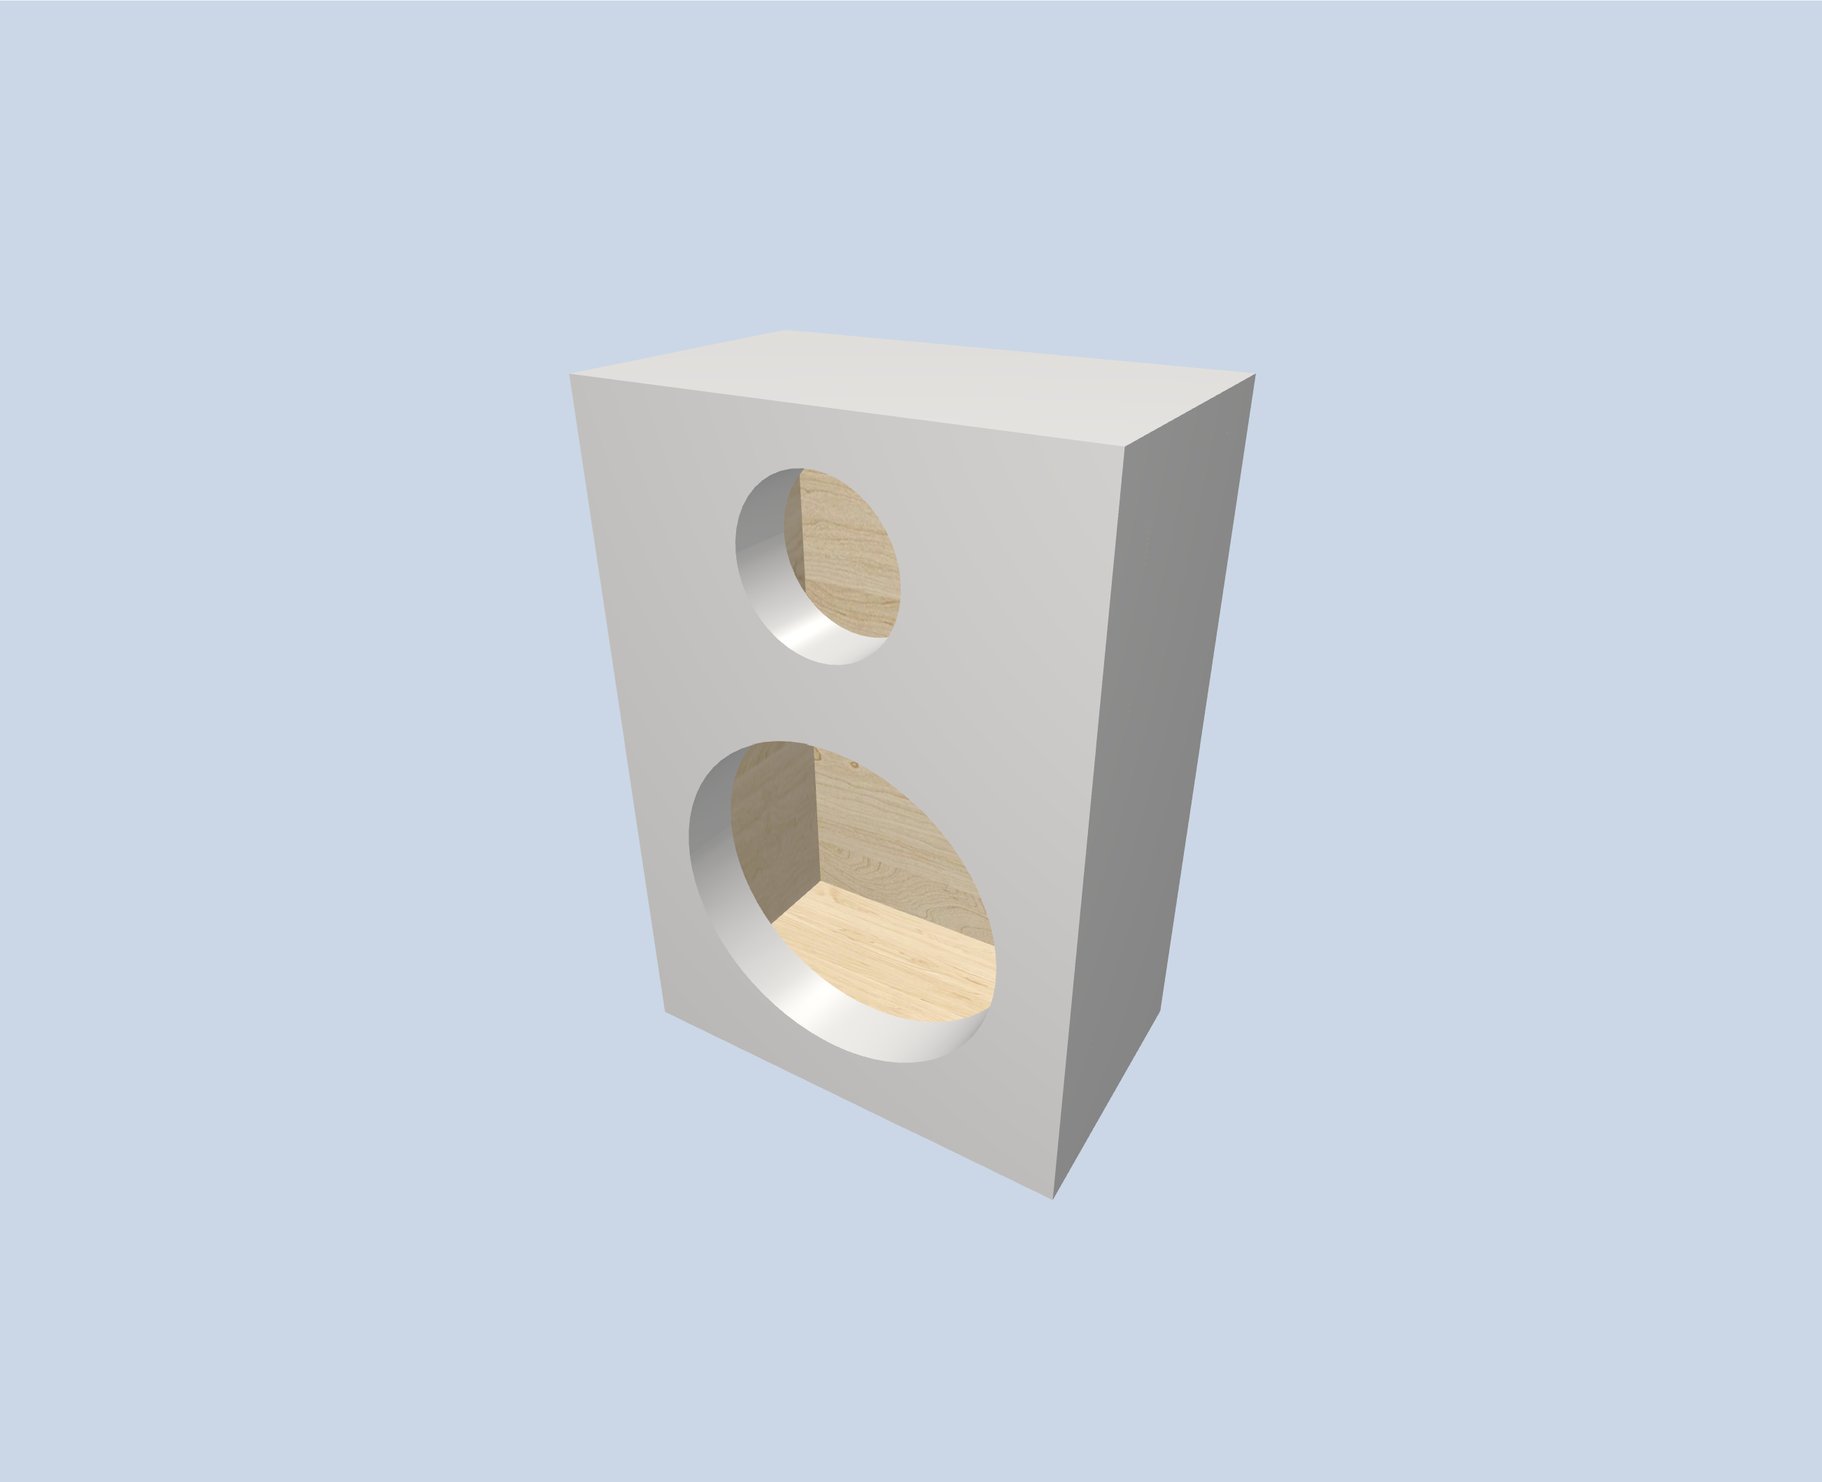
The final appearance, including applied effects such as roughness, clearcoat, specular reflection, and clearcoat roughness.
With all edges now visible and recognizable, and faces showing proper shading, the image appears significantly improved and more realistic.
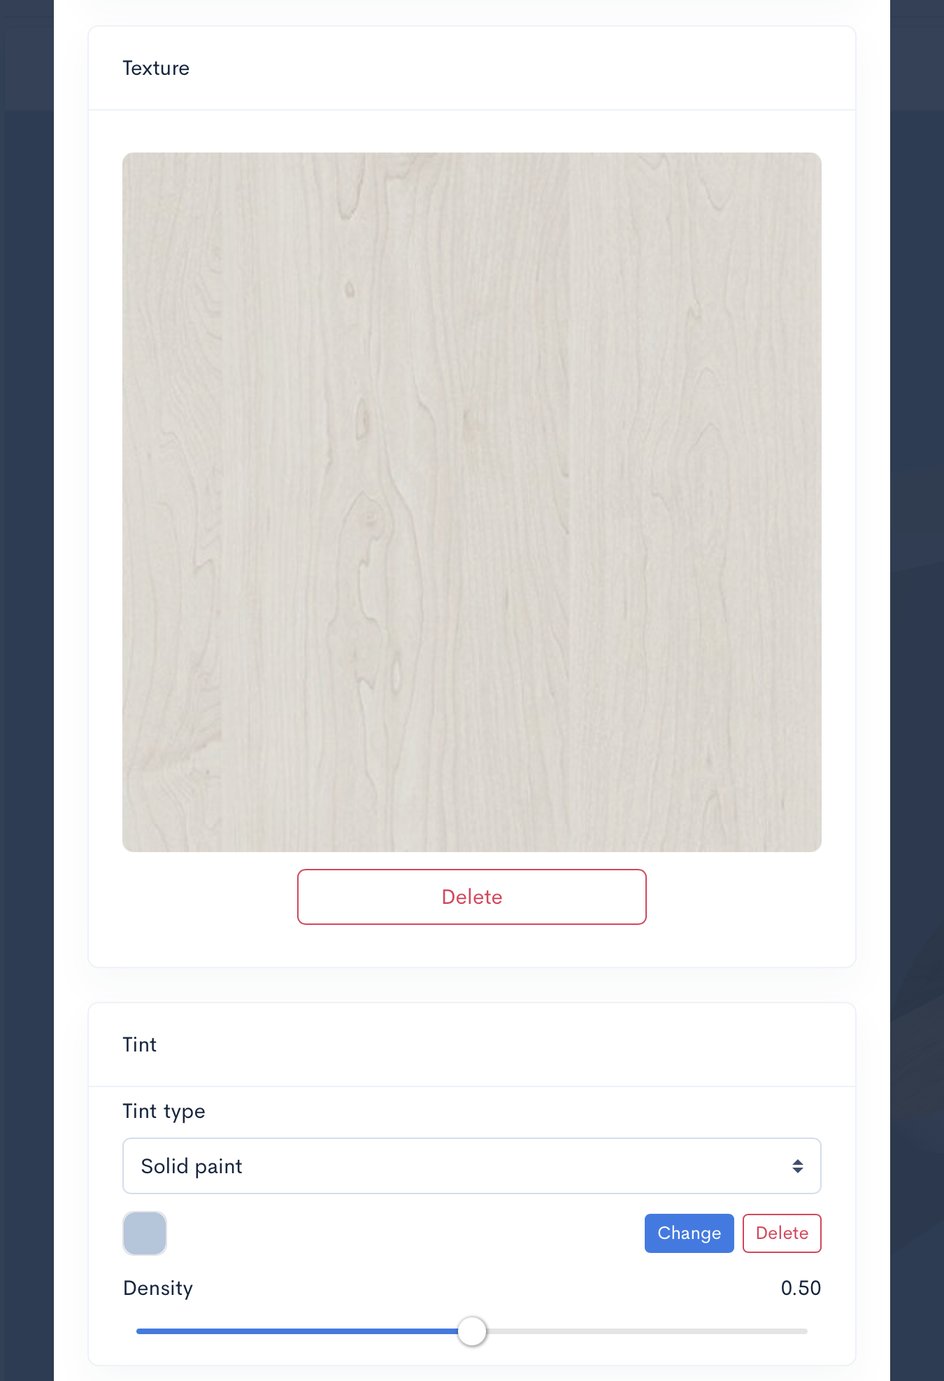
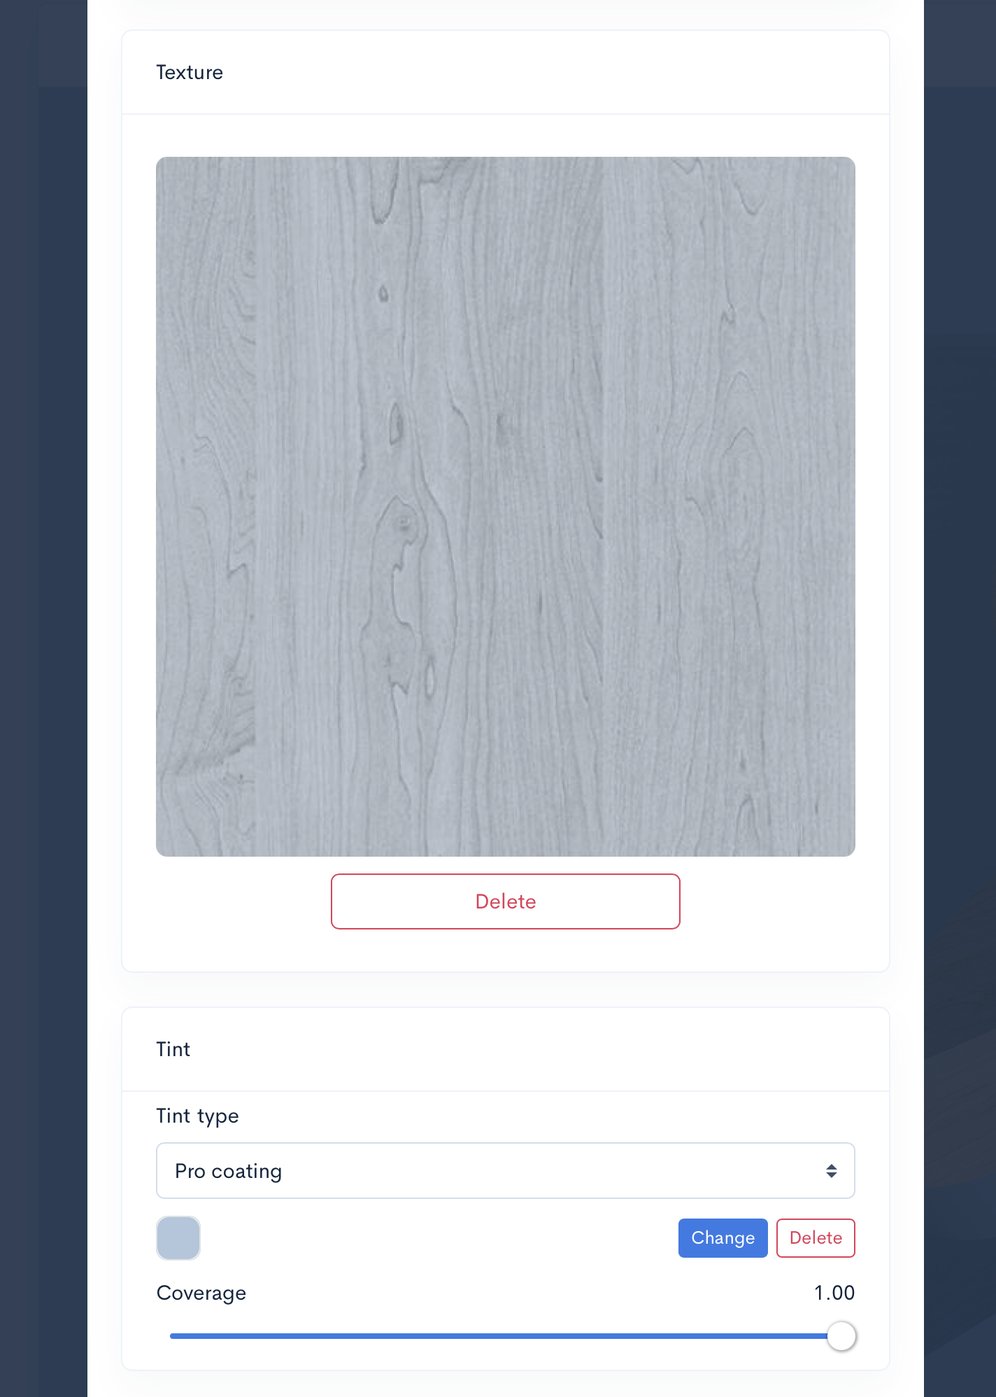
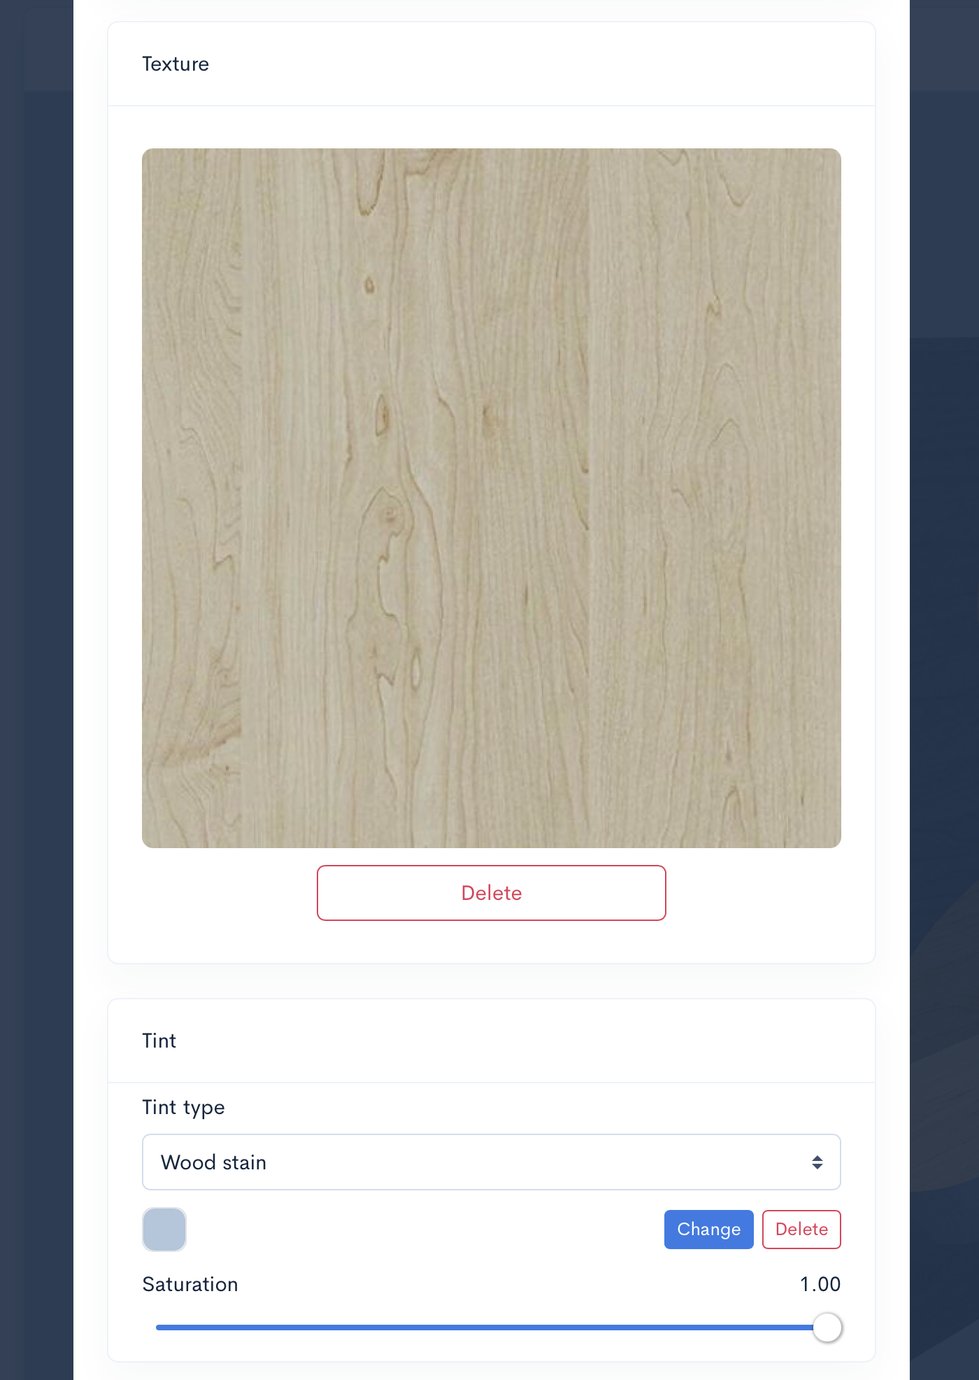
Tint Color: Texture Customization
Tint color is the final option available, and it applies exclusively to materials that utilize textures.
This feature allows for the customization of how a texture is applied to the material. It provides the capability to "paint" the material, adding color while still preserving the original texture patterns.
Available texture tinting modes - None, Solid Paint, Pro Coating, and Wood Stain
It offers four distinct options:
1. None
Effect: Natural, untouched material appearance.
Design Context: Displays the material in its raw state. Use this to showcase the natural beauty of premium wood veneers, birch plywood, or carbon fiber without any color modification. The tint color is completely ignored.
2. Solid Paint
Effect: A thick, opaque layer of color.
Design Context: Mimics a vinyl wrap or a heavy industrial paint finish. It completely hides the underlying grain and texture, resulting in a smooth, uniform look. Best for modern, minimalist speakers or cabinets made from MDF.
To replicate the Solid Paint effect, adjust the density setting. This controls the coverage level.
3. Pro Coating
Effect: Shadow-aware tinting that preserves depth.
Design Context: Simulates high-quality powder coating or textured enamel. While the color is applied heavily, it intelligently preserves the material's shadows and relief. This is ideal for maintaining the "feel" of textured plastic, leather, or brushed metal while changing its color.
Pro Coating example: Observe the color-saving pattern.
4. Wood Stain
Effect: A transparent color filter (Multiply).
Design Context: Acts like a traditional wood stain or tinted varnish. It shifts the hue of the material while keeping 100% of the natural grain pattern visible. This is the standard choice for high-end audio where you want to change the wood's tone (e.g., turning light Maple into "Deep Blue") without losing its unique organic character.
Examine the operation of the Wood Stain example. Incorporate a traditional wood stain while preserving the existing pattern.
The intensity of Solid Paint, Pro Coating, and Wood Stain is adjustable using the provided slider.
These options provide limitless possibilities for tailoring your materials.
Conclusion
This article provided an overview of the various ways to enhance the visualization of the Box Speaker Box Lite and offered tips for improving your designs. Look out for future updates, which will include even more options to refine your box designs.
Comparison of speaker enclosure finishes and material tinting options
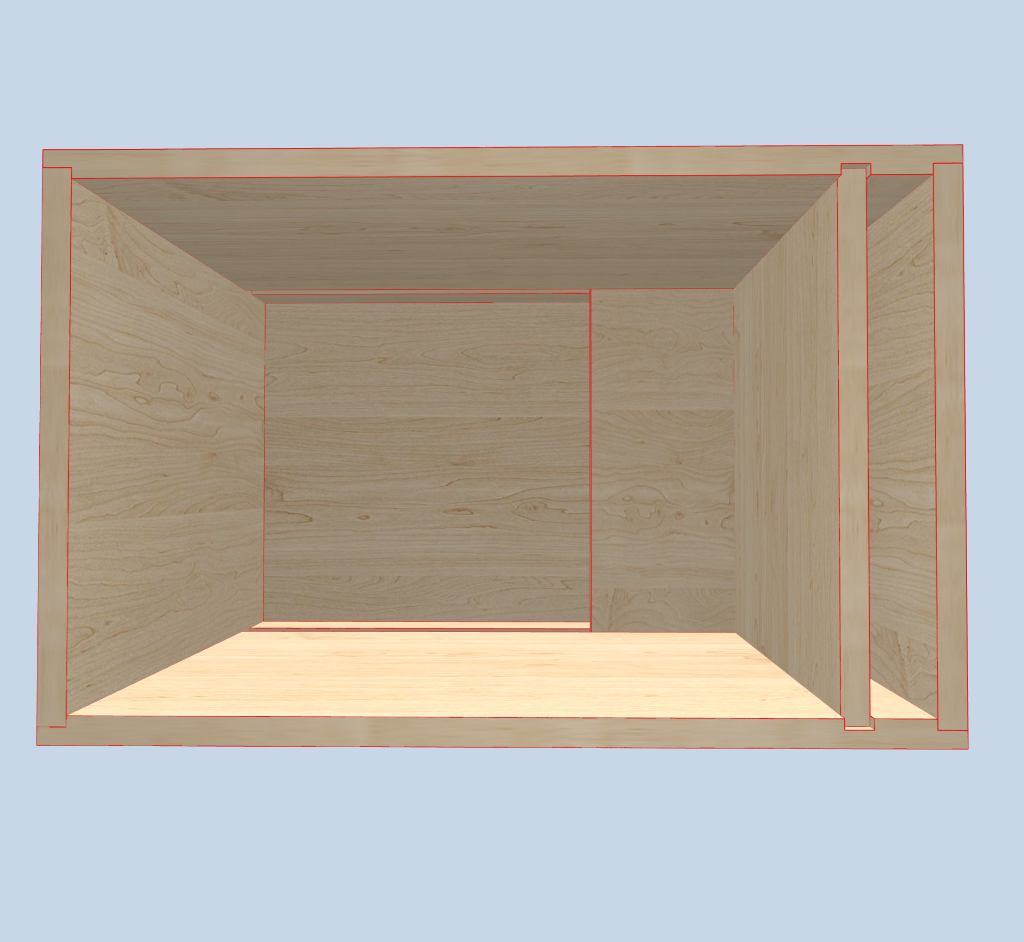
Can you explain the height, width, and length of the port?
Can you please explain the height, width, and length of the port? I have changed the height of the port to different numbers but the 3d rendering does not show any changes. I don't understand. When I go to view the parts, none of the dimension change. What part of the port does height and width signify?